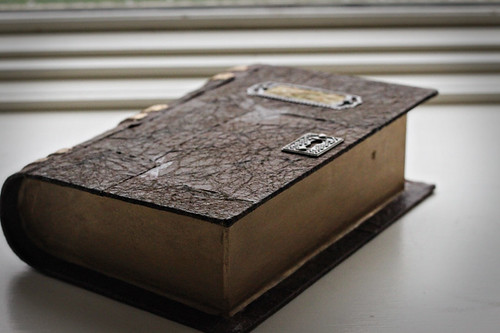
Today I would like to share how to create a secret hiding place disguised as an old leather-bound book. Whilst I should be inclined to say that it would deter most modern-day folks from investigating, one may be intrigued at such an old looking volume sitting on the shelf or bedside table enough to inspire further inspection. A rather simple process yields a rather convincing result, suitable for hiding way correspondence for safe keeping.
Right – let’s begin, shall we? First things first, our supply list…(please note – I do not receive any type of incentive for using these products, nor have any of these companies endorsed this post; this is just what I am used to using):
- 1 paper mache box in the shape of a book, found at Hobby Lobby, Michaels, or similar craft supply shops – $5.00.
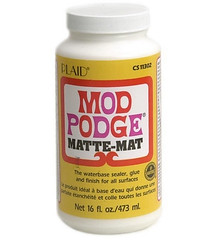
- Mod Podge (I prefer the matte finish, however you may use what you wish…or simply use a white school glue if you prefer). – $5.00, or on hand.
- 2-3 paint brushes or some other utensil of glue-spreadability…whatever that means. :)You’ll also need one or two other brushes to apply the gold finish.
- Brown paper (or any other color suitable for a leather-bound book…navy blue, hunter green, burgundy, etc…not pictured) – $5.00, or on hand.
- Brown, black, olive green stamp pads for distressing the paper – $1.00+, depending on brand or on hand (Michaels has some in their $1.00 bin).
- Brown floral tape (optional, and not pictured.) – $1.00+ (Dollar Store)
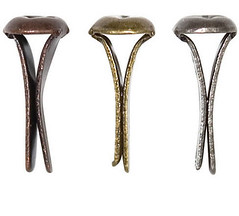
- Antique metal brads/fasteners – $3.00 (found in the scrapbook section)
- Antique metal label holders – $4.00 (again, in the scrapbook section)
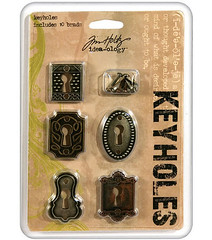
- Metal keyholes – $5.00 (scrapbook section)
- Super glue – $3.00 (or on hand)
- Gold Touch Wax Metallic finish – $4.00+ (with the gold leafing items)
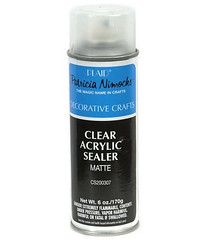
- Clear acrylic spray in matte finish – $3.00
- Fabric – $1.00/yard (just a yard, to line the inside of the box)
- Hot Glue Gun & Glue Sticks
- Wire cutters/pliers
Before we get started, be sure to cover your work surface as things could get a bit messy. Also, I don’t have any in-process pictures, but I explained as thoroughly as I could (as a trainer by nature, procedures come naturally, however I have been accused of providing too much information at times!)
Alrighty…
Begin with the paper…the paper I had was pre-cut in squares, so mine looks a bit pieced together. Next time I may try to tear the paper into irregular pieces if I cannot obtain larger pieces for more coverage. Being crinkling and wrinkling the paper (this is why it may be easier to have smaller pieces as opposed to larger sheets of paper). Just ball it up in your hands, squish and roll it around, unfold it, and repeat. The end result will be very wrinkled paper, naturally, which will simulate the look of leather. You are welcome to make it as crinkled as you wish. Mine were a combination of very, very crinkled and just a bit crinkled.
Smooth the paper out (not to the point of undoing all the beautiful crinkles!)…create enough paper to cover the surface of the book…you’ll need enough to cover all the spots where it would make sense for the leather to show through (in this case, in between the bands on the book-binding, etc). If you find it easier to cover the entire book, that’s certainly alright as well.
Using the Mod Podge, smooth a moderate amount on the surface of the book, working in smaller sections. (This may also dictate how large the paper pieces need to be when crinkling.) Press the paper onto the newly Mod Podged surface, pressing firmly to ensure a good bond. Continue this process until the surface of the book is covered. Allow to dry – it shouldn’t take too long, however better safe than sorry!
Once dry, select the distressing ink of choice – for my book I used all three colors. Simply remove the lids of the stamp pads, and one at a time, gently brush the ink pad directly onto the book’s surface – be sure not to press too hard, otherwise you’ll create a perfect imprint of the stamp pad on the book. You just want to highlight the texture of the crinkled paper to give a distressed, antiqued look.
Once the ink is dry (may take some time depending on the brand of ink/paper), take the book to a well ventilated location and on a protected work surface, spray with a light coat of acrylic sealant. This will fix the ink and give the paper an additional texture which will be important for the gold finish to be applied. Allow the spray to dry completely before proceeding.
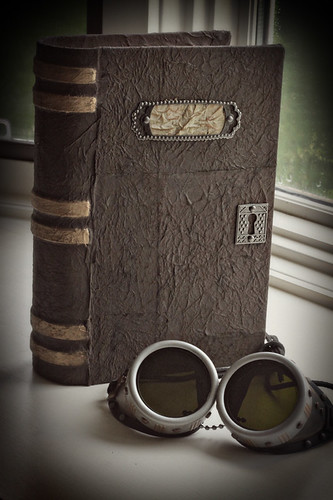
Making sure the sealant is dry (should not be cold, damp, or tacky to the touch), it is now time to apply the wax gold finish. This gold finish is kind of a fickle beast – it will cover thick and heavy, so use sparingly. It also flakes dreadfully, so make sure your work surface is protected. Dab the brush sparingly into the waxy gold, and begin ‘painting’ on the binding – there are three sets of two bands across the binding, these can be covered in gold. Cover as much or as little as desired – less of a gold finished would make for a more worn, antique look. I also ‘painted’ the page edges with the wax gold as well – to give the look of the gilded pages. Once you’re finished with the wax gold, take it back to the well-ventilated area and spray again with sealant, this time a bit heaver coat (but not so much that it pools or drips from the surface).
We’re nearly there!!
Once the spray has dried completely (not tacky, cold, or damp to the touch!), we can attach the hardware to the book’s cover. Select the keyhole of desire for the book, and the corresponding brads/fasteners. Using the wire cutters, snip the fastener tabs off the brads; using the pliers, press the remaining stubs back into the brad cap. Using the superglue, dot the back of the keyhole and place on the book’s surface. Work quickly, but be careful to avoid contact with your fingertips!! There should be two holes where the fasteners would go when attaching them to paper – fill each hole with a small pool of superglue; using the pliers, place a brad cap on each of the holes. Let this set for a few minutes until the brads and keyhole no longer move.
The same process will be used to attach the label holder to the cover of the book, if desired. I left the paper blank, as I wasn’t sure what to put on it and I didn’t want to fuss with trying to write in a convincing Victorian manner. My label holders didn’t come with labels, so I made my own…I tore strips of paper, soaked them in coffee for an antique look, and then did the crumple/crinkle and distressing routine. I glued the label to the holder, then glued the holder to the book, finishing it off with the brad caps. Allow to dry for a few minutes.
Now the box is ready to be lined. Using the fabric and the hot glue gun. I didn’t document this process because I made a real mess of it the first go around…then sort of faked my way through it to get it finished. It’s not as neat and tidy as I had hoped, but it works well. Trim the edges neatly and that should take care of that.
The finishing touch may be using the brown floral tape to clean up the edges of the book. I used some Mod Podge to attach the tape; it made the inside covers look tidy and clean. This is also optional.
If you want, you can give the book one final spray of the sealant to ensure no smudging or smearing of the gold finish or ink.
Now, stand back and admire the wonders of your craftiness!!
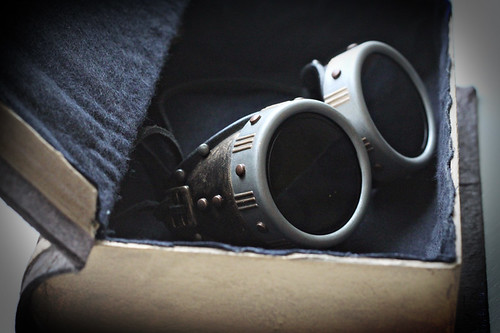
Perhaps I’ll put together a tutorial for the goggles another time…I need to purchase another pair and take some in-process pictures!
If you happen to make one, please share pictures – I want to see all the lovely creations!





This is awesome. What kind of paper though?
Hello,
I am looking for a book box that would be about 3″ thick by 7″ wide by 10 ” tall. I am desiring that it be done in an old look with a hint of a blue galaxy or a night sky with stars and milky ways. This box would need to be very sturdy to hold several items from a treasure hunt game and items. Do you ever do commissioned work? If so, what would be the cost of this item shipped to Arizona and how long would it take?
I will look forward to your response.
Thank You
Vicki
Hi Vicki! It’s been so long since I’ve made one of these, I’d hate to risk it on this one! They sell the plain boxes and books at Hobby Lobby and Michael’s in all shapes and sizes, so I’m sure you can find something that suits your needs! Sorry I can’t be of more help!