‘Tis the season for holiday parties! I recently hosted my very first Cookie & Candy Exchange with my female relatives (mom, grandmother, aunts, and cousins) – it was quite fun! I’ll post more about the party another time, but right now I wanted to share an idea for a quick and easy to make party favor or Christmas gift! Who doesn’t love a quick and easy party favor!?
I found these cute, sturdy cookie cutters at the grocery store (also sold at Michael’s if you need an excuse to go there and check out the fun Christmas stuff!) – you can use any type of cutter, but 1) the price was exceptional for these ($0.99 each!!) and 2) they seemed like they would hold up better to being in the freezer for a while (read on, you’ll see what I mean!)
OK, so…get your cookie cutters all lined up. Wash them if you need to, but for the love of all things crafty, DRY THEM THOROUGHLY!!!!
While you’re waiting on the cutters to dry, gather your supplies –
- vanilla candy coating/bark/whatever you want to call it
- candy canes, crushed into small pieces (but not totally pulverised into a fine powder!)
- peppermint extract
- vegetable oil
- glass measuring cup (or at least something microwave safe!)
- something to stir with (I just used a high-tech plastic knife…glamorous, I know!)
- cookie sheet, lined with waxed paper
- Red decorating sugar or sprinkles, optional
Alrighty…now that we’ve gathered the ingredients, it’s time to get this party started!
Arrange your cookie cutters on the lined cookie sheet, and set them aside.
Place the candy melts or vanilla bark into the microwaveable bowl or glass measuring cup. If you are using the block of bark, break it into smaller pieces. I usually heat 4 bark bricks at a time, to keep it simple. Keep a close eye on the candy as you’re melting it, as it will scorch easily! I do 30-45 second intervals, stirring each time I open the microwave to check the consistency. We will need to work quickly, but try to be cautious as the candy will be VERY hot!
Once the candy has melted, pour in a bit of vegetable oil. I start with a tablespoon, stir, and add more if needed. This will thin your candy – you want it pourable, but not super runny. DO NOT USE WATER!!!! Water + candy melts = DISASTER!! The water will cause your melted candy to separate and clump…this is a bad thing! This is why we need to make sure the cookie cutters are 100% dry too!
Right…now we’ve stirred our vegetable oil into the melted candy…we can add a little bit of pure peppermint extract. Just a very minimal amount – it’s potent stuff, people! I’d say start with 1/8 tsp, and add a little more if needed. Much like the water, if you add too much at once, it will cause the melted candy to coagulate. Not a pretty site! Once you’ve added enough peppermint extract to taste, add a few teaspoons of the crushed candy canes into the candy, and stir.
(This would be a perfect time to take a BIG gulp of wine…you know, to calm your nerves. 🙂 )
Grab the melted candy and take your cute self over to the cookie cutters (it’s easier than bringing the cookie cutters to you, especially if you’ve had that gulp of wine!). With one hand, steady the cutter against the cookie sheet, and slowly pour the melted candy with candy cane bits into the cookie cutter. A tiny amount of melted candy may spew from the bottom, and that’s ok.

Sometimes the candy spews out the bottom...
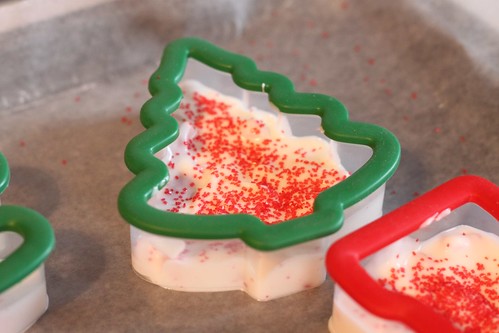
Using a plastic knife or toothpick, GENTLY spread the candy into the nooks and crannies of your cutters…be careful so you don’t move the cutter around on the tray! Fill the cutters as full as you’d like – I used the 2/3 rule, as with muffin and cupcakes.

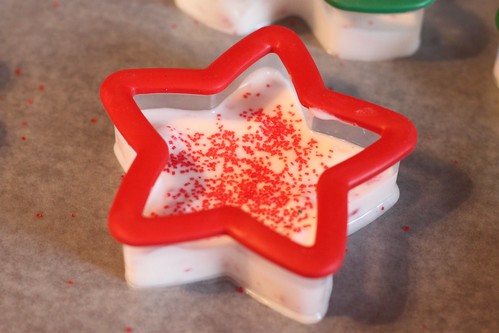
Fill cutters 2/3 full, then top with sprinkles or sugars.
Once filled, sprinkle with the red decorating sugar or sprinkles, if desired.
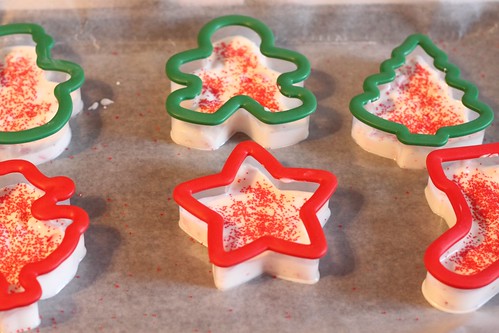
Repeat this process until all the cookie cutters are filled. Then GENTLY place the cookie sheet in the freezer so the candy can harden – I left mine in there probably 30-45 minutes, then transferred to the fridge until I was ready to package them.

Pat yourselves on the back, and finish that wine!
Packaging is my favorite part, and I didn’t get any pictures of the finished product, because I was in a rush. I just used clear cello treat bags, tied with festive curling ribbon. You can use the patterned bags if you really need to save some time – they have some super cute ones for inexpensive at WalMart ($1.00 for 25 I think).
I promise you, this project is super easy, and the results are VERY well received. You’ll be whipping these up for all kinds of reasons – they’d make great teacher’s gifts, baby sitter gifts, hair dresser/dog walker/neighbor-you-don’t-know-very-well gift…and party favors!
If you decide to make some of these, or have another party favor idea, post a link to them in the comments – I’d love to see what you creative folks come up with!