I am going to try to share more craft projects with you guys – I’ve got a lot of things stashed away, and just haven’t taken the time to write a proper tutorial yet!
Even though we’ve already passed Halloween, I’d still like to share this tutorial for a Halloween Chunky House with you! It’s a fun little project, and you can make it as simple or as complex as you like.
First things first – What the heck is a Chunky House?
“Chunky” in crafty lingo refers to anything that is decorated in a 3-dimensional manner…that is to say, embellished within an inch of its life. You start with a base that is made of cardstock, foam core, paperboard, etc. Then….we decorate!! Glitter, stickers, twine, buttons, scrapbook papers, miniature figures…whatever your eerie little heart desires!
I’m providing a supply list for you, but please feel free to branch out on your own and create something unique! You don’t even have to make a Halloween house – it can be anything you love! Christmas, Winter, Circus, etc.
Supply List:
- Your favorite snacks and beverage…hey, crafting is hard work…you have to keep your strength up! Just don’t glue your snacks to your fingers!
- A fun Halloween playlist, or movie in the background (when I craft, I like to have background noise to inspire/entertain me…Hocus Pocus is my favorite!)
- The first and most difficult part – choose a theme for your house. You can craft along with me in this tutorial, or choose your own theme.
- Base material for the house – cereal box, cardstock, poster board, foam core, etc. I’m using cereal box.
- Template for your house. A good size would be anywhere from 3″ to 5″ wide, and 6″ to 8″ tall; any larger and it is a little overwhelming to work with. I try to keep the lines pretty simple. I’ll be using this one for the project: https://farm3.staticflickr.com/2943/15252230570_08e50b484b.jpg
- Various Papers — scrapbooking papers, maps, sheet music, wrapping paper, book pages, etc…whatever you want! (I’m using scrapbook paper that I picked up at a craft store – it’s Martha Stewart’s line of Halloween paper packs which are two-sided – here is something similar from Amazon: http://amzn.com/B008MVTY06)
- Embellishments — stickers, beads, lace, ribbon, buttons, glitter, yarn, bottle caps, old game pieces, feathers, glass marbles, polymer clay, old postage stamps, rubber stamps & ink pads, etc. Really let your imagination run wild!
- This is the main clip art piece I’ll be using, but feel free to add more or change it up!https://farm4.staticflickr.com/3927/15383341456_83d072e658.jpg
- This is a great source for free images (all the images she posts are in the public domain) –http://thegraphicsfairy.com/search/
- Color printer if printing images for your house.
- Glue Dots/Glue Stick to affix the paper items to the house (note: If you’re using larger embellishments, you might want to use a hot glue gun)
- Scissors
- Straight edge or ruler to aid in folding
- Durable work surface (self-healing cutting mat if you’re a hard-core crafter, otherwise just make sure when you use your craft knife you don’t damage whatever is underneath!)
- Optional – Craft knife (helpful when cutting detailed images)
- Optional – Clear sealant spray
Let’s Get Crafty!
1) Use a template to trace the outline of the house onto your base material and cut it out.
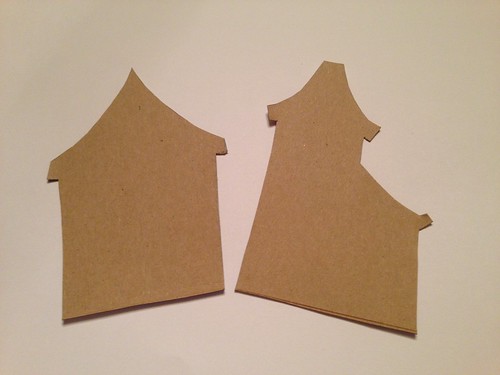
House templates cut out of base material.
2) Choose some paper for the “interior” of our house…I promise this will make sense later! You can use anything you wish – book pages, magazine pages, anything goes! Again, trace the outline of the house on the paper, cut it out, then glue it to your base material. Be sure cover the whole house, so you don’t have any unexpected bare spots in your design.
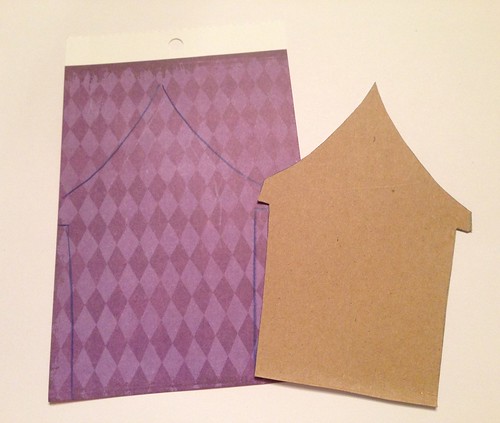
Trace template onto interior paper.
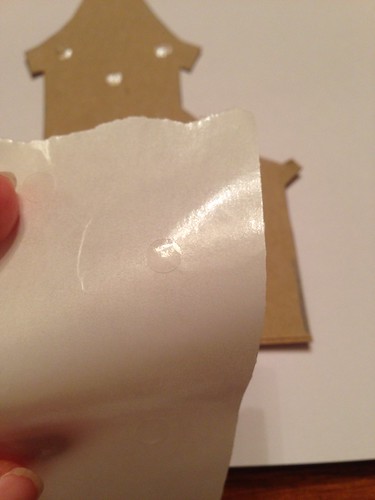
Apply glue of choice...these are glue dots!
3) Decide on an “exterior” for your house – use patterned paper, or whatever you wish. Trace the outline of the house and cut it out.
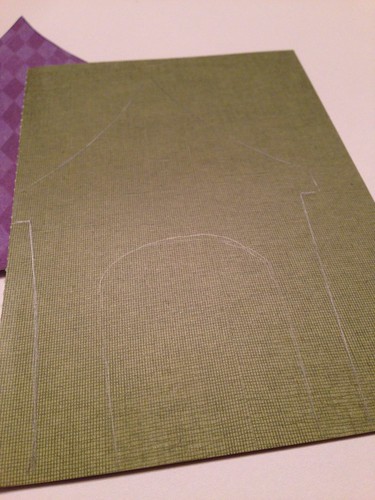
Trace house onto exterior paper...
4) Now you need to decide if you want a door or a window…For a door, simply cut a 3-sided rectangle or a rounded opening (see picture) and use a straight edge to fold back the door.
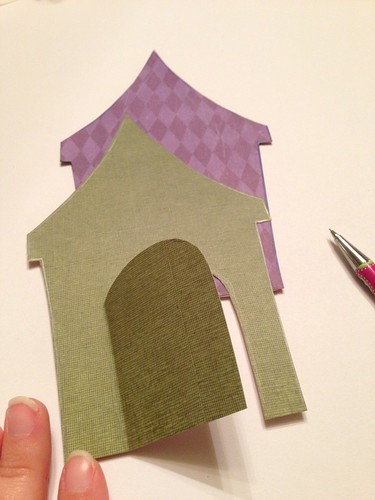
Trace the door, and partially cut.
5) Once you have the door cut and folded back, affix to the house. DO NOT GLUE YOUR DOOR SHUT! You want your creepies to be able to roam freely about the dwelling. (If you want windows, decide how you want them cut out – the house with Edith (shown at the end of this tutorial), I cut each “pane” individually, which was a little tedious, but I loved the end result!)

Exterior paper attached - door still opens!
6) Now….we DECORATE!! Break out the glitter, feathers, bottle caps, whatever you can find! It really becomes a game — how many different things can you add before it is “too much”? Remember, you can follow along with this tutorial, or you can decorate in your own way. Make it yours!!
If you want to follow along, print out Headless Harriet. It should be to size already, but you can play around with it if you need to. Decide where you want her to live, and then attach her to the house.
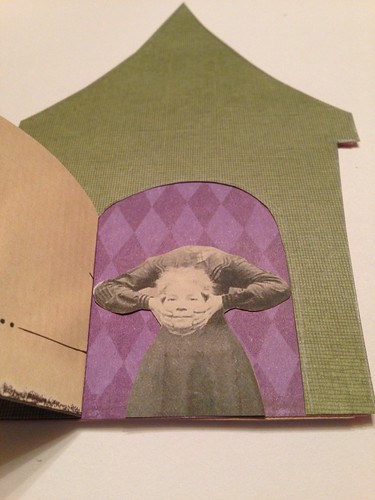
Decide where you want your embellishments...
I also cut out a simple scallop design for the roofline, and used the double-sided adhesive squares, cut down to fit…this will give it a little dimension.
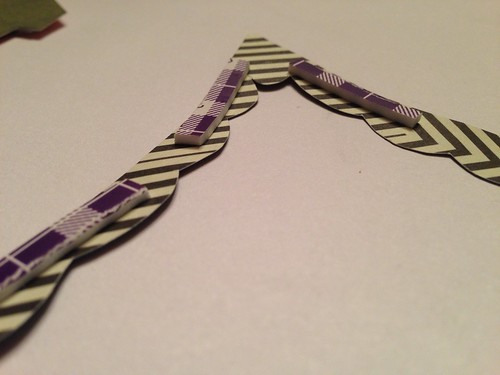
Cut a scallop design for roof, attach using double-sided adhesive.
On the front of the house, I added a little Jack o’Lantern embellishment…I used the double-sided adhesive again to add diminution.
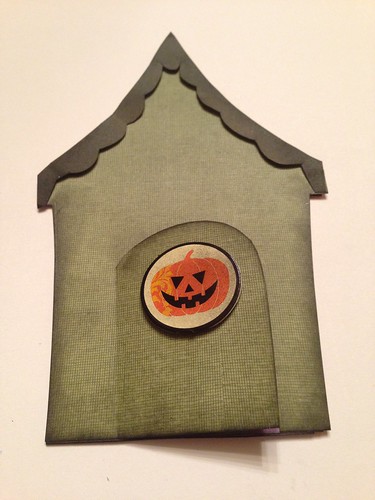
Add embellishments until you're content!
When you’re satisfied, use an ink pad in black or brown to grunge it up a bit. I just dab it around the edges of the house, on any corners or straight lines to tone down the color a bit. If you choose to do this, you might want to spray the finished house with a clear sealant spray (be sure you’re in a well-ventilated area!) to avoid any smudging!
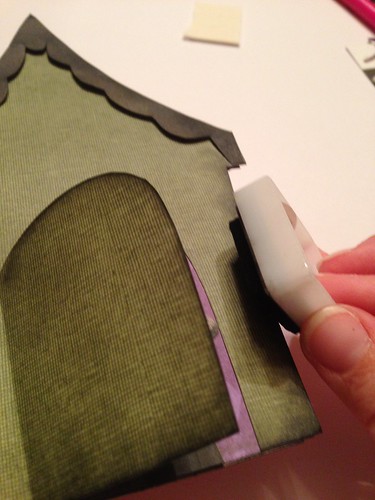
Use dark ink to add some extra grunge to your house.
Pro Tip – DO NOT GLUE anything down until you are happy with the placement!
- Poe’s House – Roof: I wanted textured shingles on this house…so I used some polymer clay cut to fit the shape of the roof (lesson learned – cut it a bit larger than the base), add any texture to it, then follow the manufacturer’s instructions for baking/curing. Door: I wanted this house to be an ode to E. A. Poe, so I printed an image of him I liked, and affixed it to the center of the door opening. In the front of the door, I glued a bottle cap that was painted black, and “rusted up” with some markers (I also folded down the edges)…in the center of the cap is the number 31 (for Halloween), and then I topped it off with one of those flat-backed glass marbles. They magnify whatever is underneath! Extras: I wasn’t quite happy with it yet, so I added some extra embellishments – some feathers (homage to The Raven) and some glittery orange spheres to add some extra Halloween goodness to it. Bonus:the papers I used were all double-sided!

Ode to Poe
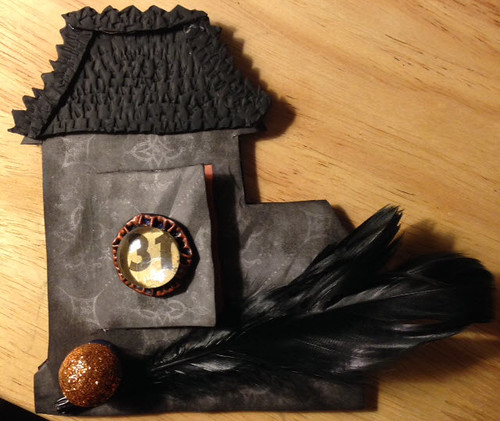
Ode to Poe
- Edith’s House – Roof: I just cut scalloped shapes from black paper and layered them until I was happy with the placement. Window: I based this off a Victorian Ghost story (The Mystery of Monk’s Hollow by J. Keith) in which Edith is said to be gazing out the window into the dark and stormy night…so, there is Edit, staring out into the dark and stormy night. And something bad happens to her husband…but the story cuts off so we are only left to our imaginations as to what it could be! Alexander the Seer: he’s the one who knows what’s happened to Edith’s poor husband…muahahahaa! Here I’ve repeated the bottle cap usage with the printed image of Alexander the Crystal Seer and another glass marble. Door: this one was a simple idea of just affixing a keyhole to the location where the door would be.
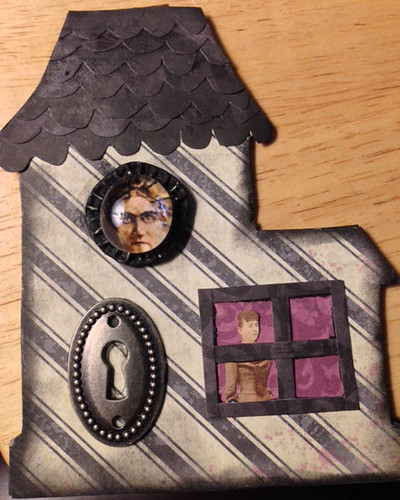
Edith's House
OK – I’m done…now what the heck do I do with it? Well, my friends, that is up to you! You have a couple options:
- To display your house, you can lean it against something for the sake of simplicity.
- If you’ve decorated the back as well (always an option!), you can make a little holder for the house (kind of like a game piece holder…better yet, you could always recycle those mismatched game pieces this way!)
- You can string a few of them together to make a sort of bunting out of them…and hang them for the world to see.
- Or, if you’re feeling generous (and the embellishments won’t suffer any damage), you could send one to a friend!
That concludes this tutorial for a Halloween Chunky Houses – I hope you had fun! If you decide to make one, please share your creations either in the comments, or catch me on Twitter @ThePeachMartini, using the tag #ChunkyHouse!
In the words of my favorite glamour ghoul, Vampira…”Bad dreams, darlings!”